Bleaching Knots on a Wig: How-To Guide
- Raw Hair Vendor

- Aug 20, 2024
- 4 min read

Bleaching knots on wigs might seem like a daunting task, but with the right guidance, it’s a straightforward process that can significantly enhance the natural look of your wig. In this guide, we’ll break down everything you need to know, from understanding the basics to executing the technique flawlessly. Let’s dive in and make your wigs look their absolute best!
Why Bleach Knots on Wigs?
The Significance of Bleaching Knots
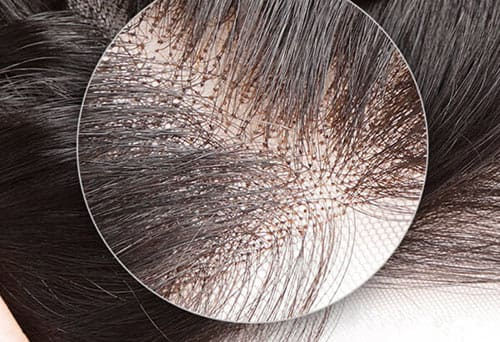
Wig knots are the tiny loops where hair strands are tied into the lace. These knots can be quite visible, creating dark spots on the lace that make the wig look less natural. Bleaching these knots lightens the color of the knots, making them blend with your skin tone. This simple yet effective technique helps in achieving a seamless, natural-looking wig that appears as if the hair is growing directly from your scalp.
Bleached Knots vs. Unbleached Knots
Bleached Knots:
Appearance: The black knots are transformed into a lighter, more natural color—usually brownish or blondish.
Pros: Gives a realistic scalp-like look, enhancing the overall appearance of the wig.
Cons: Bleaching can potentially cause some shedding if not done correctly, but this is typically manageable with proper care.
Unbleached Knots:
Appearance: The black knots remain visible on the lace.
Pros: Simpler process with a lower risk of over-processing.
Cons: Less natural-looking, as the black dots can be quite noticeable.

What Are Wig Knots?
Wig knots are essentially the points where individual hair strands are tied to the lace base. These knots are crucial for the construction of the wig, but they can also be a bit of a nuisance if they are too visible. By bleaching the knots, you can reduce their prominence and create a more realistic look.
Tools Needed for Bleaching Knots
To achieve the best results, you’ll need the following tools:
Bleaching Powder (30 or 40 volume developer)
Mixing Bowl (Plastic or glass)
Scoop
Applicator Brush
Popsicle Sticks or plastic knife
Aluminum Foil (Optional, but recommended)
Neutralizing Shampoo
Shimmer Lights Shampoo
Disposable Gloves
Water Spray
Hair Comb
Lace Wig

Step-by-Step Guide to Bleaching Knots
Step 1: Prepare the Wig
Wet the Hair: Lightly dampen the hair with a spray bottle. This prevents the bleach from seeping through the lace and affecting the hair.
Brush the Hair: Brush the hair back to ensure it doesn’t lay flat on the lace, which could cause the bleach to bleed.
Dry the Lace Base: Blow dry the lace thoroughly to ensure it’s dry. This step is crucial for the bleach to adhere properly.
Position the Lace: Make sure the lace is facing up, allowing for an easy application of the bleach.
Step 2: Prepare Your Bleach Mixture
Mix the Bleach: In your mixing bowl, combine one scoop of bleach powder with two scoops of developer. For beginners, a 30 volume developer is recommended as it provides a slower bleaching process and reduces the risk of over-bleaching.
Adjust Quantities:
Lace closure wig: 1 scoop of bleach powder and 2 scoops of developer.
Lace frontal wig: 1 ounce of bleach powder and 2 ounces of developer.
Full lace wig: 3 ounces of bleach powder and 6 ounces of developer.
Achieve the Right Consistency: Your mixture should be creamy and not too runny. If it’s too thick, add more developer; if it’s too loose, add more bleach powder.
Step 3: Apply the Bleach
Apply the Bleach: Use popsicle sticks or a plastic knife to gently apply the bleach mixture to the lace. Start from the hairline and work your way across.
Be Precise: Avoid applying too much bleach to prevent it from seeping through and turning the roots blonde. Ensure the knots are thoroughly and evenly coated.
Cover and Wait: If using aluminum foil, cover the bleached area to help with heat retention. Allow the bleach to process for 20-45 minutes, checking every 10-15 minutes until the knots reach the desired color.
Step 4: Rinse and Wash
Rinse the Bleach: Use water to rinse out the bleach as much as possible.
Shampoo: Wash the wig with neutralizing shampoo to stop the chemical reaction and remove any residual bleach.
Tone the Knots: Apply shimmer lights shampoo to tone the knots and make them blend better.
Condition: Use a conditioner to keep the hair soft, shiny, and manageable.
How to Fix Over-Bleached Knots
If you find that you’ve over-bleached your knots, don’t panic. Here’s how to fix it:
Dye the Knots: Use a hair dye to correct the color if the knots are too light.
Temporary Fixes: Use makeup or a temporary color spray to adjust the roots.
Toners: Apply a liquid toner or shimmer lights shampoo to correct the color. Purple shampoo is effective for blonde knots, while blue shampoo can help with orange tones.
Summary
Bleaching knots on wigs is a fantastic way to achieve a more natural and realistic look. By following this guide, you can master the technique and ensure your wig looks flawless. Remember to use the right tools, mix your bleach properly, and be patient during the process. With a bit of practice, you’ll achieve stunning results every time!
FAQs
1. How can I avoid over-bleaching my wig knots?
Ensure your bleach mixture is not too watery and apply it carefully. Check the process frequently and rinse once the knots are adequately lightened.
2. Should I use conditioner after shampooing?
Yes, conditioner helps to keep the hair soft and adds shine, making it easier to manage.
3. Does bleaching make the wig shed faster?
No, while bleaching can cause some damage if not done correctly, it doesn’t necessarily lead to increased shedding.
4. Is aluminum foil necessary for the bleaching process?
Aluminum foil helps retain heat and can enhance the bleaching process, but it’s not absolutely essential.
5. Can I pluck the wig before bleaching the knots?
It’s better to bleach first as it softens the knots, making them easier to pluck afterward.


Comments